
Key takeaways
- Do not use a heat gun, hair dryer, or torch. Added heat can spread the plastic, warp the housing, damage wiring, or create fumes.
- Do not run a cleaning cycle. Heating the unit may bake the residue into the finish and circulate fumes through the appliance.
- Do not scrape with metal. Scratches can trap grease and may expose a conductive or rust-prone layer.
- Do not soak the appliance. Air fryers contain electrical parts that are not designed for immersion or heavy spraying.
- Do not use strong solvents casually. Acetone and similar chemicals can soften appliance plastics and remove markings.
- Do not ignore odor or smoke. A persistent burnt-plastic smell after cleaning can indicate residue inside the appliance.
- Do not test it with food first. Run no cooking cycle until the exterior is clean, dry, and free of visible damage.
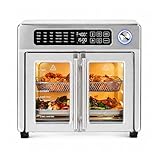
When a plastic bag, lid, utensil, or countertop protector touches a hot air fryer, it can soften and fuse to the exterior. The safest way to clean melted plastic off an air fryer exterior is to remove it gradually without spreading the residue, scratching the housing, or pushing moisture into electrical openings. Rushing with a knife, abrasive pad, or high heat can permanently damage the finish, expose wiring, or create irritating fumes. These steps work for common countertop units, including basket-style models such as the Cosori TurboBlaze 9-in-1 6-quart air fryer (about $120) and larger oven-style units such as the Emeril Lagasse 26-quart French Door Multi-Function Air Fryer Toaster Oven (about $190). Always prioritize the cleaning instructions in your specific manual.
What You Need
| Item | Why | Optional? |
|---|---|---|
| Heat-resistant gloves | Protect your hands from softened plastic and warm surfaces | No |
| Plastic scraper or old plastic gift card | Lifts softened residue without the sharp edges of a knife | No |
| Microfiber cloths | Wipe away loosened plastic and cleaner without scratching | No |
| Dish soap and warm water | Removes greasy film and ordinary residue | No |
| Plastic-safe, nonabrasive cleaner | Helps dissolve the final thin film on the exterior | Optional |
| Ice in a sealed bag | Makes thick plastic brittle enough to chip away more easily | Optional |
| White vinegar | Can help with a light odor or greasy residue after scraping | Optional |
| Flashlight | Reveals residue around seams, handles, and ventilation slots | Optional |
Do not use acetone, paint thinner, gasoline, oven cleaner, chlorine bleach, steel wool, melamine foam, or a metal razor. These products can dull or dissolve plastic, damage painted surfaces, or leave behind unsafe residue. Use disposable gloves if the melted material came from unknown packaging.
As an Amazon Associate we earn from qualifying purchases at no extra cost to you. Product prices and availability are accurate as of the date shown and are subject to change.

Step-by-Step
1. Unplug the air fryer and identify the affected area (5 minutes)
Disconnect the air fryer from the wall outlet before touching the melted plastic. Do not rely only on the power button. Move the appliance to a well-ventilated area away from children, pets, and food-preparation surfaces.
Inspect where the plastic is attached. Determine whether it is on a removable basket, the outer housing, a door, a handle, or near a vent, control panel, cord, or seam. If plastic has entered a vent or has fused around a control, stop after the exterior inspection and review the “When to Call a Pro or Replace” section below.
2. Let the appliance cool completely (30–60 minutes)
Wait until the air fryer is cool to the touch. If it was operating when the plastic melted, allow at least 30 minutes of cooling time; a larger 26-quart toaster-oven-style unit may need closer to 60 minutes. Never try to soften the plastic by turning the appliance back on. Heating unknown plastic can release unpleasant fumes and may spread the mess.
3. Remove loose pieces by hand (2–5 minutes)
Put on heat-resistant gloves and gently pull away pieces that are already loose. Work from the outer edge toward the center so you do not lift surrounding labels, trim, or a coating. Place the removed plastic in the trash rather than down a drain.
If the plastic is thick and rubbery, hold a sealed bag of ice against it for 5–10 minutes. The goal is to make the residue firmer, not to wet the appliance. Dry the area immediately if condensation forms.
4. Lift the main residue with a plastic scraper (10–20 minutes)
Hold a plastic scraper or old gift card at a low angle, roughly 20–30 degrees from the surface. Push gently under one edge of the plastic using short strokes. A low angle distributes pressure and reduces the chance of gouging a painted or textured finish.
For a large patch, work in sections no wider than about 1 inch at a time. Stop if the scraper begins catching on the appliance surface. Never use a kitchen knife, screwdriver, box cutter, or metal putty knife. Avoid scraping across door gaskets, touch controls, printed symbols, and ventilation slots.
5. Loosen the remaining film with mild soap (5–10 minutes)
Mix about 1 teaspoon of mild dish soap with 2 cups of warm water. Dip a microfiber cloth into the solution and wring it until damp, not dripping. Lay it over the residue for 2–3 minutes, then wipe gently. Repeat once or twice if necessary.
Do not pour water onto the air fryer or spray cleaner directly on the housing. Keep liquid away from the fan intake, exhaust, control panel, power cord connection, door seams, and basket openings. For a narrow edge, use a barely damp cotton swab and dry immediately with a clean cloth.
6. Treat only the final thin film (5–10 minutes)
If a transparent or greasy film remains, apply a small amount of a plastic-safe, nonabrasive cleaner to a cloth—not to the appliance. Test it first on an inconspicuous spot. Rub lightly for 10–15 seconds, check the finish, and continue only if there is no discoloration or tackiness.
For residue that is mainly greasy, a diluted white-vinegar solution may help: combine equal parts vinegar and water, dampen a cloth, and wipe the area once. Do not mix vinegar with bleach or other cleaners. Avoid vinegar on unsealed metal, decorative finishes, or surfaces that the manufacturer says to clean only with water.
7. Rinse, dry, and check for damage (10 minutes)
Wipe the cleaned area with a separate cloth lightly dampened with plain water, then dry it thoroughly. Use a flashlight to check seams and vents. Look for melted trim, warped plastic, exposed metal, cracked insulation, damaged buttons, or a lingering electrical or chemical odor.
Leave the unplugged air fryer open in a ventilated room for several hours before using it. If any residue remains near a heating element, fan, electrical opening, or food-contact surface, do not operate the appliance until the manufacturer or a qualified appliance technician has assessed it.
Mistakes to Avoid
- Do not use a heat gun, hair dryer, or torch. Added heat can spread the plastic, warp the housing, damage wiring, or create fumes.
- Do not run a cleaning cycle. Heating the unit may bake the residue into the finish and circulate fumes through the appliance.
- Do not scrape with metal. Scratches can trap grease and may expose a conductive or rust-prone layer.
- Do not soak the appliance. Air fryers contain electrical parts that are not designed for immersion or heavy spraying.
- Do not use strong solvents casually. Acetone and similar chemicals can soften appliance plastics and remove markings.
- Do not ignore odor or smoke. A persistent burnt-plastic smell after cleaning can indicate residue inside the appliance.
- Do not test it with food first. Run no cooking cycle until the exterior is clean, dry, and free of visible damage.
How Often
Remove melted plastic as soon as the appliance is cool enough to handle. Do not wait for the residue to collect dust or harden further. For routine care, wipe the exterior after every 3–5 uses or whenever grease is visible. Clean around handles and control areas weekly if the air fryer is used daily, and inspect vents monthly.
Keep at least 4–6 inches of open space around the air fryer unless the manual specifies a different clearance. Store plastic bags, cutting boards, paper towels, and silicone items away from the hot appliance and its exhaust path.
When to Call a Pro or Replace
Stop cleaning and contact the manufacturer or a qualified appliance technician if plastic has entered a vent, fan, heating chamber, control panel, or door cavity. Also seek help if the cord, plug, housing, insulation, display, or controls are melted, cracked, loose, or discolored.
Replace the appliance if it smokes, trips a circuit breaker, sparks, smells like burning plastic after several hours of ventilation, heats unevenly, or has exposed wiring. Replacement is usually more sensible than repair when the unit is older, heavily warped, or priced in the roughly $100–$200 range. Do not sacrifice safety to preserve an inexpensive countertop appliance.
FAQ
Can I use a razor blade to remove melted plastic?
No. A razor can scratch painted metal, stainless steel, plastic trim, or a coated door. Use a rigid plastic scraper instead, applying light pressure and working in small sections.
Will rubbing alcohol remove melted plastic?
It may soften some residue, but it can also dull or discolor certain plastics and printed finishes. Use it only if your manufacturer approves it, test an unseen area first, and never apply it near an energized appliance or open flame. Mild soap is the safer first choice.
Is it safe to use the air fryer after cleaning?
It is safe only when all visible plastic is removed, the appliance is completely dry, no residue is near internal components, and there is no unusual odor, smoke, electrical noise, or damage. If you are unsure where the plastic went, do not use the appliance until it has been inspected.
What if the plastic melted onto a removable basket?
Remove the basket and let it cool before scraping with a plastic tool. Wash it separately with mild dish soap and warm water, following the care instructions for its coating. If the coating is scratched, blistered, peeling, or permanently fused with plastic, replace the basket rather than trying abrasive cleaners or high heat.





Write Your Review
No reviews yet. Be the first to share your experience!