
Key takeaways
- Best Condenser Microphones for Recording: Choose by Room, Voice, and Setup The best condenser microphone for recording is a large-diaphragm cardioid model for most untreated home studios, while a small-diaphragm pair is usually the better fit for detailed stereo instrument…
Best Condenser Microphones for Recording: Choose by Room, Voice, and Setup
The best condenser microphone for recording is a large-diaphragm cardioid model for most untreated home studios, while a small-diaphragm pair is usually the better fit for detailed stereo instrument recording. Match the microphone to your room and source first; a higher price or wider frequency range cannot compensate for reflections, fan noise, or poor placement.
Quick picks by recording situation
| Situation | Good starting choice | Why it fits | Watch out for |
|---|---|---|---|
| Spoken voice or singing in a treated room | Large-diaphragm cardioid, such as the Audio-Technica AT2020 | Versatile, straightforward to position, and commonly available at an entry-level price | It needs 48 V phantom power and can make room reflections obvious |
| Bright voice or untreated room | Dynamic cardioid microphone, or a condenser with a controlled upper-frequency response | A dynamic mic may capture less room sound when used close; a smoother condenser can reduce harshness | Microphone type alone does not reject room echo; placement matters |
| Quiet source or detail-focused studio recording | Low-noise large-diaphragm condenser, such as the RØDE NT1 | Low self-noise helps preserve quiet details when the room and preamp are also quiet | Low self-noise will not remove computer fans, traffic, or electrical hum |
| Acoustic guitar, piano, or stereo instrument capture | Matched small-diaphragm pair, such as sE Electronics sE8 microphones | Compact capsules are convenient for accurate placement and stereo techniques | Two mics require two clean preamp inputs and careful phase-aware placement |
| Podcasting or frequent desk recording | USB condenser, such as the Blue Yeti | Built-in USB conversion and selectable pickup patterns simplify a computer setup | Its sensitivity can pick up keyboard sounds and reflective-room echo |
Condenser microphone specifications that affect your decision
Figures below are manufacturer-published specifications for representative models. Sensitivity and self-noise figures are not always measured or presented under identical conditions, so use them as useful reference points rather than a laboratory ranking. Specifications can change by product revision; check the current manufacturer documentation before buying.
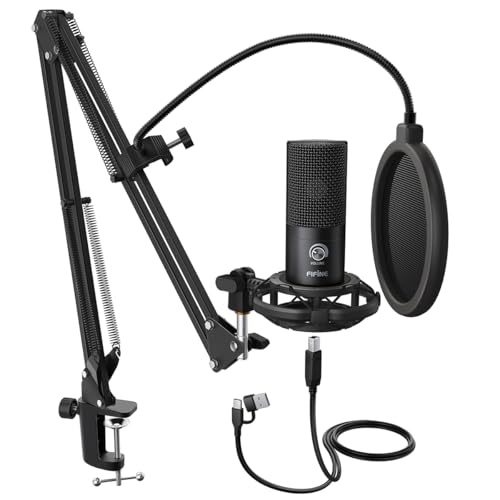
FIFINE T669 Studio Condenser USB Microphone for Recording Podcasting
Included for 'Best Condenser Microphones for Recording' as a relevant option in this category; details come from the product listing.
View on Amazon
Logitech Creators Blue Yeti USB Microphone for PC, Mac, Gaming, Recording, Streaming, Podcasting, Studio and Computer Condenser Mic with Blue VO!CE effects, 4 Pickup Patterns, Plug and Play - Blackout
Included for 'Best Condenser Microphones for Recording' because the listing specifies Mac and Gaming, details this guide uses to compare options.
View on Amazon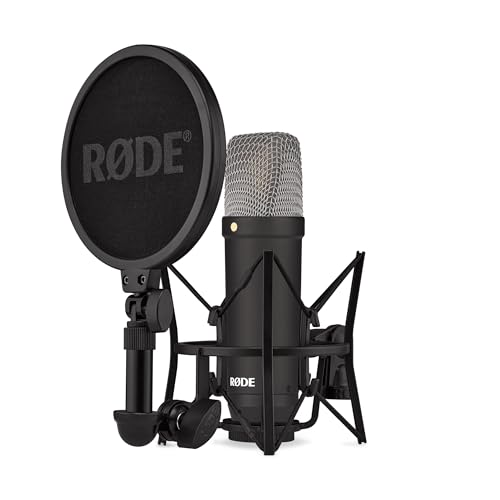
RØDE NT1 Signature Series Studio Condenser Microphone, Black
Included for 'Best Condenser Microphones for Recording' because the listing specifies Black, details this guide uses to compare options.
View on Amazon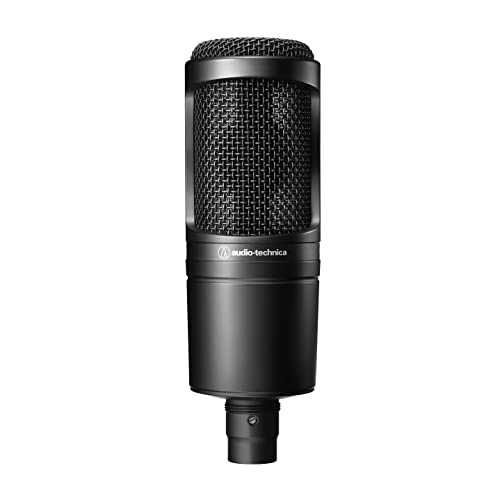
Audio-Technica AT2020 Cardioid Condenser Studio XLR Microphone, Ideal for Project/Home Studio Applications, Black
Included for 'Best Condenser Microphones for Recording' because the listing specifies Ideal for Project/Home Studio Applications and Black, details this guide uses to compare options.
View on Amazon| Microphone | Type and pattern | Frequency response | Sensitivity | Self-noise | Approx. weight |
|---|---|---|---|---|---|
| Audio-Technica AT2020 | Large-diaphragm condenser, cardioid | 20 Hz–20 kHz | −37 dBV/Pa | 20 dB SPL | 345 g |
| RØDE NT1 (5th Generation) | Large-diaphragm condenser, cardioid | 20 Hz–20 kHz | −32 dBV/Pa | 4 dBA | 308 g |
| Lewitt LCT 440 PURE | Large-diaphragm condenser, cardioid | 20 Hz–20 kHz | 27.4 mV/Pa | 7 dB(A) | 310 g |
| sE Electronics sE8 | Small-diaphragm condenser, cardioid | 20 Hz–20 kHz | 25 mV/Pa | 13 dB(A) | 141 g |
Large versus small diaphragm
Large-diaphragm models are popular for vocals and voice-over because they are easy to position and offer a familiar studio sound. Small-diaphragm condensers are often chosen for instruments, stereo pairs, and placements where a compact body is useful. Neither type is automatically more accurate or flattering: capsule design, polar pattern, room, and source all matter.
Polar pattern: start with cardioid
Cardioid picks up most sound from the front and rejects more from behind, making it a practical starting point for one voice or instrument. It does not reject sound arriving from the sides as strongly, and reflections can still reach the capsule from walls, a desk, or the ceiling. Omnidirectional microphones capture sound from all directions and can work well in a good room; figure-eight patterns capture front and rear while rejecting the sides. Multi-pattern microphones are useful when you will actually record those configurations, but they add cost and setup choices.
Frequency response, sensitivity, and self-noise
A quoted response such as 20 Hz–20 kHz states the measured range, not how evenly or pleasantly the microphone reproduces it. A presence lift can help a voice cut through a mix, but may exaggerate sibilance. Read a response graph when available, and listen for fit with the specific voice or instrument.
Sensitivity indicates how much electrical output a microphone produces for a given sound pressure. A more sensitive mic generally needs less preamp gain, but also produces a larger signal for nearby room noise. Self-noise is the microphone’s own electronic noise, specified in dB(A) or dB SPL depending on the manufacturer. Lower is better for quiet sources, provided the room and recording chain are quiet enough to benefit.
Pick by budget, experience, and recording space
| Your situation | Practical choice | Buying priority |
|---|---|---|
| Tight budget; first XLR microphone | Entry-level cardioid condenser, such as the AT2020 | Reserve money for an audio interface, stand, pop filter, and basic acoustic improvements |
| Experienced user recording vocals in a quiet room | Low-self-noise large-diaphragm condenser, such as the NT1 | Choose tonal character, noise performance, and needed connectivity |
| Small or reflective room; mostly voice | Close-positioned cardioid mic, or a dynamic mic if room sound is a persistent problem | Prioritize control of reflections and background noise over extended response |
| Regular stereo acoustic-instrument recording | Matched small-diaphragm pair, such as the sE8 pair | Budget for two mic inputs, stands, and time to place the pair |
| Occasional calls, streaming, and desk use | USB condenser with useful onboard controls | Check computer compatibility, monitoring, mute controls, and how easily it picks up desk noise |
As a broad market guide, entry-level XLR condensers often cost roughly $80–$200, while more feature-rich studio models and pairs can run from a few hundred dollars upward. Prices vary by country, configuration, and included accessories. Do not stretch the microphone budget if it leaves no room for a stable stand or suitable interface.
Set up a condenser to capture a cleaner recording
-
Check the whole signal chain. An XLR condenser normally needs an audio interface or preamp with 48 V phantom power. Connect the mic before switching phantom power on, and turn it off before unplugging. USB models connect directly to a compatible computer and generally do not use interface phantom power.
-
Reduce noise and reflections first. Turn off noisy fans where practical, move away from windows, and record in the quietest part of the room. Soft furnishings can reduce some reflections, but a blanket or thin foam does not soundproof a room. Listen to a test recording through headphones before committing to a take.
-
Position for the source. Start roughly 15–20 cm from a speaking or singing mouth, with the mic aimed slightly off-axis to reduce plosive bursts and sharp “s” sounds. For guitar, try aiming toward the neck-body join rather than directly at the sound hole, then listen and adjust. Those distances are starting points, not rules.
-
Set gain with headroom. Ask for the loudest expected performance and adjust the preamp so peaks do not clip. Leave several decibels of headroom rather than trying to record as close as possible to 0 dBFS. A pop filter helps control bursts of air; it does not replace good mic technique.
-
Check the pattern and channels. For a single voice, select cardioid if available and speak into the intended front of the capsule. For a stereo pair, keep both capsules and recorded channels configured as intended, and check mono playback for cancellation or a hollow tone.
Ownership details that affect long-term value
Condenser capsules and internal electronics are precision components. Avoid drops, moisture, smoke, and blowing directly into the capsule to “test” it. Store the microphone in its case or a clean, dry place, and use a soft brush or manufacturer-approved method for exterior dust. Do not spray cleaner into the grille. A removable pop filter or foam windscreen is a consumable that may need replacing if it becomes damaged or difficult to clean.
Common avoidable problems include buying a sensitive condenser for a noisy room, placing it too close to a reflective wall, recording with the wrong side facing the speaker, and mistaking room echo for a microphone defect. Before replacing a mic, record a short comparison at matched volume, move the mic and speaker, and check cables, gain, and room position. Those fixes are often cheaper—and more effective—than upgrading.






Write Your Review
No reviews yet. Be the first to share your experience!