
Key takeaways
- Using bleach inside the water path: Bleach is difficult to rinse completely and can damage seals or leave unsafe residue. Follow the manufacturer’s cleaning instructions instead.
- Mixing cleaners: Never combine vinegar, bleach, ammonia, descaler, or dish soap in the same container.
- Using boiling water: Very hot water can warp some plastic reservoirs. Warm water is sufficient.
- Running cleaner through a charcoal filter: Remove the filter before descaling and replace it when necessary.
- Cleaning only the visible tank: The lid, outlet, carafe, brew basket, and internal water path can recontaminate the reservoir.
- Leaving vinegar overnight: Longer is not automatically better and may stress seals or leave a persistent odor.
- Scrubbing aggressively: Scratches make plastic harder to keep clean.
- Putting non-dishwasher-safe parts in the dishwasher: Verify the manual first, especially for clear plastic lids and reservoirs.
A drip coffee maker’s water reservoir can look clean while holding mineral scale, coffee oils, dust, and biofilm. If you clean it badly, you may leave behind a soapy or vinegary taste, scratch the plastic, damage a filter or sensor, or create a damp environment where mildew returns quickly. The safest approach is to remove what you can, wash the reservoir by hand, treat mineral buildup with a mild descaling solution, and rinse the machine thoroughly.
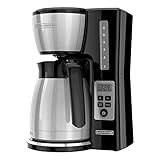
This guide explains how to deep clean a drip coffee maker water reservoir without guessing about materials or using unnecessarily harsh chemicals. It works for common 10- to 12-cup brewers, including models with removable tanks such as the Hamilton Beach One Press 12 Cup Coffee Maker and standard brewers such as the Ninja Fresh Brew 12 Cup Coffee Maker. Set aside about 45 to 60 minutes, including soaking and rinse cycles.
As an Amazon Associate we earn from qualifying purchases at no extra cost to you. Product prices and availability are accurate as of the date shown and are subject to change.


What You Need
| Item | Why | Optional? |
|---|---|---|
| Warm water | Loosens residue and rinses away cleaner | No |
| Unscented dish soap | Removes dust, oils, and light organic buildup | No |
| White vinegar or coffee-maker descaler | Dissolves mineral scale and hard-water deposits | No; use one |
| Soft bottle brush or nonabrasive sponge | Reaches corners without scratching plastic | Recommended |
| Microfiber cloth | Dries the tank and wipes the surrounding housing | Yes |
| Small flashlight | Helps inspect seams, corners, and the water outlet | Yes |
| Measuring cup | Makes the cleaning solution easier to portion | Yes |
Use a commercial coffee-maker descaler if the manual specifies one. Otherwise, a common starting mixture is equal parts white vinegar and water, but check your brewer’s instructions first. Some manufacturers recommend a weaker solution or prohibit vinegar. Never combine vinegar with bleach, ammonia, or another cleaner.
Step-by-Step
1. Unplug the coffee maker and remove loose parts (5 minutes)
Turn off the brewer, unplug it, and let any hot plate or recently heated water cool completely. Remove the carafe, brew basket, permanent filter, charcoal water filter, and the reservoir if it lifts out. Empty unused water rather than letting it sit while you clean.
Check the manual before forcing a tank, lid, float, valve, or filter holder. Some reservoirs are removable; others are permanently attached. If the machine has a charcoal filter, take it out before using vinegar or descaler. Replace the charcoal filter if it is old, discolored, slimy, or past the manufacturer’s recommended service interval.
2. Inspect the reservoir and outlet (3 minutes)
Use a flashlight to look inside the tank. Pay particular attention to the bottom corners, lid hinge, seams, water-level markings, and the small outlet or valve underneath. White or chalky patches usually indicate mineral scale. Brown or greasy film can be coffee residue carried back by a dirty lid, carafe, or brew path.
Do not poke a valve with a knife, paper clip, or other sharp object. A damaged seal can cause leaks or prevent the brewer from detecting the water level.
3. Wash the reservoir with dish soap (8 to 10 minutes)
Fill the reservoir with warm water and add a small amount of unscented dish soap—about 1 teaspoon for a typical 10- to 12-cup tank. Clean the inside with a soft bottle brush or nonabrasive sponge, reaching the corners and underside of the lid. If the tank has a narrow opening, swirl the solution rather than inserting a rigid utensil.
Rinse repeatedly with warm water until there are no bubbles or slippery areas. Soap residue is one of the most common causes of an off flavor after cleaning.
4. Treat mineral scale (15 to 20 minutes)
For a removable reservoir, fill it with your approved descaling solution. If using a vinegar mixture and the manufacturer permits it, combine equal parts white vinegar and water. For heavy scale, let the solution sit in the reservoir for 15 minutes, but do not leave it overnight unless the instructions specifically allow extended contact.
Wipe softened deposits with the soft brush or sponge. Do not use steel wool, a razor, scouring powder, or a melamine sponge on clear plastic; these can create fine scratches that collect residue and make the tank look permanently cloudy.
If the reservoir cannot be removed, pour the solution into the tank and run the brewer according to its cleaning instructions. Stop the cycle if the machine leaks, makes an unusual electrical smell, or displays an error.
5. Clean the water outlet and lid (5 minutes)
Use a damp cotton swab or soft brush around the outlet, lid channel, and valve opening. Do not flood the control panel or pour cleaner over the brewer’s exterior. For a removable valve assembly, remove it only if the manual says it is user-serviceable.
Wash the carafe and brew basket separately. Coffee oils left in either part can make a freshly cleaned reservoir smell dirty again.
6. Run two to three fresh-water cycles (10 to 15 minutes)
Reassemble the machine without coffee or a paper filter. Fill the reservoir with clean water, place the empty carafe correctly, and run a full brew cycle. Discard the water and repeat at least once. Use a third cycle if you still notice a vinegar smell, cloudy water, or a slick feel.
Do not taste water directly from the machine while it is hot. Let the final cycle cool, then smell it. It should have no strong chemical, sour, or musty odor.
7. Dry and reassemble (5 minutes)
Unplug the machine again and remove the tank if possible. Wipe the outside and underside with a clean microfiber cloth. Leave the reservoir, lid, carafe, and brew basket open and separated until completely dry. Trapped moisture under a lid or around a valve encourages mildew.
Install a fresh charcoal filter if your model uses one, then run water through the brewer once more if the filter instructions call for rinsing. Reassemble only after every part is dry.
Mistakes to Avoid
- Using bleach inside the water path: Bleach is difficult to rinse completely and can damage seals or leave unsafe residue. Follow the manufacturer’s cleaning instructions instead.
- Mixing cleaners: Never combine vinegar, bleach, ammonia, descaler, or dish soap in the same container.
- Using boiling water: Very hot water can warp some plastic reservoirs. Warm water is sufficient.
- Running cleaner through a charcoal filter: Remove the filter before descaling and replace it when necessary.
- Cleaning only the visible tank: The lid, outlet, carafe, brew basket, and internal water path can recontaminate the reservoir.
- Leaving vinegar overnight: Longer is not automatically better and may stress seals or leave a persistent odor.
- Scrubbing aggressively: Scratches make plastic harder to keep clean.
- Putting non-dishwasher-safe parts in the dishwasher: Verify the manual first, especially for clear plastic lids and reservoirs.
How Often
Wash the removable reservoir weekly if you brew daily. Empty leftover water after every use, wipe visible splashes, and leave the lid open to air-dry. Descale about once a month in a hard-water area or whenever brewing slows, the machine becomes noisier, or chalky deposits appear. In a soft-water home, descaling every two to three months may be enough.
Replace disposable charcoal filters according to the manual, commonly every one to two months or after a stated number of brew cycles. A deep clean in 2026 does not replace routine drying and filter changes.
When to Call a Pro or Replace
Stop using the brewer and seek professional service if water reaches the electrical controls, the cord or plug becomes hot, you smell burning, or the machine repeatedly trips a circuit. A cracked reservoir, leaking valve, warped lid, or failed water-level sensor is usually a replacement-parts issue rather than a cleaning issue.
For a basic 10- to 12-cup brewer, replacement cost can be reasonable: the listed Ninja Fresh Brew Coffee Maker is priced at $69.99, while the Hamilton Beach One Press 12 Cup model is listed at $69.59. If a replacement tank, shipping, and labor approach the cost of a new brewer, replacement is often the more practical choice. Choose a model with a removable reservoir if easier cleaning is a priority.
FAQ
Can I use baking soda to deep clean the reservoir?
Baking soda can help neutralize odors and gently loosen light residue, but it is not the best descaler. It does not dissolve hard-water scale as effectively as an approved descaling product or vinegar solution. If you use it, rinse thoroughly and do not mix it with vinegar in the reservoir.
How do I clean mold from a coffee-maker water reservoir?
Remove the tank and wash it with warm water and dish soap first. Follow with the manufacturer-approved descaling or sanitizing method, then rinse through several complete cycles. If mold remains in a seam, valve, or inaccessible channel—or if the plastic is cracked or deeply scratched—replace the reservoir or brewer rather than relying on surface cleaning.
Can I clean a nonremovable reservoir?
Yes. Add the approved cleaning solution, run the brewer as directed, discard the liquid, and run at least two fresh-water cycles. Keep liquid away from the control panel and never tilt or submerge the entire machine unless the manual explicitly permits it.
Why does my coffee still taste sour after cleaning?
Residual vinegar or descaler is the most likely cause, so run another one or two full water cycles. Also wash the carafe, brew basket, and permanent filter, and replace an old charcoal filter. If the taste persists after thorough rinsing, internal scale, deteriorated tubing, or old coffee oils in the brew path may require service or replacement.




Write Your Review
No reviews yet. Be the first to share your experience!